Tuesday, 4 December 2012

A triple one :D Some thing green's going down!

OKAAAAY, I missed some days, I'm out of practise haha, well I'm gonna let you in on a secret! I told you I'm doing Disney Princesses right? Well I extended it into any Disney heroine! AND... Their respective foes :D so tonight I have for you Fiona, Fairy Godmother and Rumplestiltskin! Whhhheeeeeeeeeeeee :)

 First for fiona, grab yourself green eyeliner, blue eyeliner and silver liner, also grab silver glitter and green glitter eyeliners as well as a lime green eyeshadow.
Super simple, on your upper eyelid, line first with green all the way across above your lashes, flick the end, then above the green, draw halfway in to the upper lid from the inner corner with the blue, finish it off the the silver and match the green flick. Now, grab the green glitter liner and line over the green liner in green glitter, and with the silver glitter, go over the silver liner. Lastly apply some eyeshadow to your lower lashline.
Donesies!


Pretty I think :)
Now for the madam! FAAAAAIRYGODMOTHER!
Grab a pale pink eyeshadow, a purple eyeshadow, a silver glitter eyeliner, a purple glitter eyeliner and a black liquid eyeliner and a tube of purple mascara.
First off, cover your eyelid in the pink eyeshadow, then highlight the outer corner in the purple. Next grab your silver glitter and line the lower lashline half way in from the inner corner of the eye, complete the line with purple glitter liner. Then grab the black eyeliner and starting from just over half way into the upper lid, draw a black line on the upper lashline that gradually thickens as it reaches the outer corner of the upper eyelid, DON'T add a flick. It looks like I have on the photo, but that's from making a correction with a baby wipe, it dragged the end a little, please excuse it. Finish with a slick of purple mascara
A sexy glam look that I'm sure she'd love :D
Mmmm purpley...
Now for Stiltskin tehehe
Go get your hands on some orange eyeshadow, some reddish-orange eyeshadow (or dark orange), coral eyeliner and gold glitter eyeliner. (Also, fetch your angry wig if you happen to have one ;D)
Now, all the way up to your brow, apply the orange, blend it at the edges so it's not a harsh splodge of colour, next, on the outer corner from the eyelid up again to the brow, blend the darker shadow. Now that's done, get your gold liner and draw big swirls and stuff on your lids, make sure to apply the liner so the gold is dense and easily visable, you can make a guide with non-glittery gold eyeliner before hand if you like to intensify the colour of the gold.
Tadaaaaa, I began watermarking on recommendation from a friend of mine, I keep it out the way of the pretty parts so don't worry about it :D
Enjoy shreking it up guys.

Thursday, 29 November 2012

Princess Merida

BE BRAVE!
Yep, get your grr face on for some Scottish slap I have for your delectation...
MERIDA:
You're going to want a nude lipstick that's slightly darker than your own skin tone, orange eyeshadow, light blue eyeshadow and some light pink or peachy blusher.
Forstly get your face matte and flawless, I have an earlier blog post on just how to do this if you go back and check :)
Once you have that down, get a small amount of blush on an angled blusher brush and tap it onto your cheek bone (if you have trouble finding your cheek bones, suck your cheeks in and you'll see them) and blend the blush in soft circles towards the temple. Now apply your lipstick, then take an eyeliner brush and apply orange eyeshadow to the inner corner of the upper eyelid on both eyes, then using another brush (or clean the first one) and apply blue eyshadow to the outer corner and blend the two colours where they meet.
Once this is all done you have yourself a princess' flawless skin and distinct eyes to boot :)
Tomorrows princess will be a suprise :D
xxx

Wednesday, 28 November 2012

All clear.

Good news guys! My face has cleared up, and I will be up and running with posts again soon, probably tomorrow :D When I will do Princess Meridia make up (the Brave films princess).

Wednesday, 31 October 2012

Flares of the unwanted kind

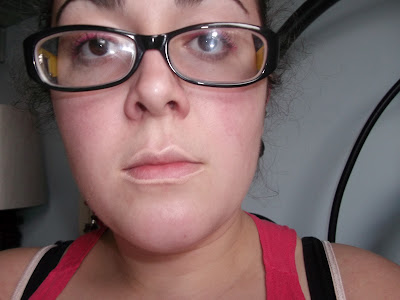
Hi guys, don't worry I haven't dropped off the planet again, and I will be posting up, only I cannot wear make up for a while as I have had an eczema flare up on my face!! I look terrible and it's painful to put make up on so for a while I will likely have to put tutorials on hold. In the meantime I will make sure I post up hints and tips, and work to combat the eczema which is on my chin, eyelids and cheeks :(
I'm annoyed that it has happened while I trying to do the Disney ladies looks :( But never mind things happen. If you don't know what eczema is google it, I only have a mild form of it but it's still a burden to handle (think lond sleeve tops all year round, lotions and potions and frequent trips to doctors).
Anyway, I will see you all again soon
<3

Monday, 22 October 2012

Gee Whiz! It's Minnie!

YES FOLKS! I am available for looks again!
Got my schedule sorted and I'm on track :)
I won't be here this weekend I'm in London meeting the BFs Dad's family :s wish me luck xx
I have settled well into uni life and as we speak am procrastinating from doing some actual work :D
So here is some Disney goodness as I launch back into make up with a full (as full as I can make it) tribute to the Disney female cast.
You'll want a black eyeliner (preferably pencil, but liquid is good too) and a bright pink eyeliner.

Oki Doki, firstly draw the round ear outlines at angles just above the line of the eyelids crease, then draw a curved line between the two "ears" and from them to the outer and inner corners of the eye lids. Now draw a bow as if it was resting on your lashes (I think I would have liked to use thick black false lashes on this on second thoughts...) and fill that in with pink.
Fill in the ears and where ever is not pink, with black...
Tada, Minnie Mousey :D
For a back ground to Minnie Mouse: http://disney.wikia.com/wiki/Minnie_Mouse
Next it will be Princess Mérida from Brave :D

Wednesday, 17 October 2012

Long time no post!

Been super busy with uni, what with societies and lectures and the fact that nurses are not expected to have a life outside of learning to be a nurse!!!
But less of my complaining :)
I can't post a look tonight as I'm going scuba diving, it would be a waste of make up, I will however, share with you a time saving (and money saving) few tips.
First off, don't think eyeliners are just for your eyes, use them as brow pencils, lip liners (or lipstick if your swish a little lipbalm over it after applying the eyeliner on your lip), face paints. Saves you buying extra products and it means you have more available colours for whatever it is you want to do.
Don't bother buying fixants for your make up! Use hairspray, hold the can as far as you are able from your face and gently squeeze some spray onto your face, it'll hold your make up just as well. I'm sure it's common knowledge but I'll tell you anyway, don't bother buying bb cream if you already have a foundation that suits you, just mix your face moisturiser with a dab of foundation at approximately 1:3 (for example, for every 1 finger full of foundation mix it with 3 finger fulls of moisturiser). Want longer more conditioned eyelashes and brows? Before you go to bed, grab a clean, dry mascara brush and rub it into some vasline and sweep it onto brows and eyelashes, you'll have long shiny lashes and conditioned tame brows :)
That's all I can think of for now, so go forth and be beautiful :)
xxx

Tuesday, 11 September 2012

Beauuuuty Tip

Helloo my darlings I appologise for neglecting you, I'm just so busy getting my act together to go to uni :)
Ah well, here we go again, me making sure you're all looking after each other!
Ok beauty tip #4
I've told you in previous tips, about your skin type, sleep and keeping your tools clean.
Now I'm telling you about "vices" such as smoking, drinkning and so on. You know smoking is bad for the skin... but did you know drinking alcohol (especially in large amounts) messes your skin up? That eating too much convenience food (apart from making you fat) is bad for your skin?
The solution? Drink less, quit smoking and eat better. Easier said than done, I know junk food is addictive and I come from a place where BABIES are fed MacDonalds (which is just wrong) and smoking is the norm from about 11 years plus (despite the legal age for the purchase of tobacco being 18) and drinking is almpst a sport. Now I'm not say don't drink, don't eat junk food, I'm saying in moderation. A glass of wine on an evening is not excesive and will not harm your skin, but drinking maybe half a bottle a night is bad, it speeds up the aging process, cause your skin to look waxy and bloated with dark circles under your eyes and bloodshot eyes and rosacea (where your cheeks and nose take on that drunk old man redness). It also causes weight gain and makes your skin spotty because it  weakens your bodys ability to flush out toxins because it damages your liver. Smoking we should know by now affects how we look, the chemicals in the smoke are so damaging, the effects include, premature aging, grey tinged skin, it weakens your hair, it dries the skin and makes you more prone to spots and on top of all that, it stinks and gives you those lines around your lips that lipstick bleeds into making you look like a crazy lady. With fast food, the effects are known, people who eat alot of fast food have to find places to store all those extra calories... they appear as fat, it also makes your hair greasy, makes you more prone to spots (think the stereotypical fast food worker, greasy face covered in spots from the grease used to cook the food). Exercising restraint on yourself is a good idea, think to yourself as you pass the takeaway do you want a burger? Or do you want to spend less on make up and face wash to get rid of the spots and have more natural sexy spot free skin? Do you want that cigarette or would you rather more money to spend on the new must have lipstick? Or having a coffee or going to the movies? Or on a spa facial? Would you rather another 3 glasses of wine or would you rather clear even toned skin and fresh eyes? If you do, MODERATION!!!!! Except cigareets, quit smoking, there are helplines and guidance to help you quit and I bet your family and friends will be more than supportive! Take care of yourselves because you deserve it, you deserve to look as good as you possibly can and feel good.
So go and be beautiful.
xxx

Thursday, 6 September 2012

some glamour puss :3

Been waiting for my new lipsticks to arrive before I posted something new, because I was determined to use them... hehe so I appologise for the wait. But it is so worth it, check this out...
You're going to want to grab yourself a black eyeshadow and a plum coloured lipstick (by plum I mean any rich pruple/red colour).
Apply your black eyeshadow onto your eyelind and under the lash line (use an eyeliner brush for that bit) then gently smudge the edges for a soft focus effect. Now following the steps in my never stray ever stay lipstick post, apply your plum lipstick. Don't wear blusher with this look, you want a pale and interesting effect here as that is the fashion this season, dark colours and creamy skin with your autumn hues of rich golds and purples for a decadent appeal.
For extra oomph, coat your lashes in some of your favorite volumising mascara (mine's bourjoise) to make your eyes look sultry and alluring. Or for a fresher day time look (with the added bonus of lifting some years of those looking for a quick fix) keep your eyes nude except for some mascara and apply the rich colour to your lips, make sure you follow my tips in my never stray ever stay lipstick post to avoid bleeding lipstick and you're sorted!
Enjoy yourself, and I'll be back soon :)

Friday, 31 August 2012

Just a bit of wacky neon brightness

Long title, but I had no pun for it so hey-ho, I'm back to my more wild looks at the moment, taking inspiration from the 80's and the colours in my mums garden.
Right you'll need a purple eyeshadow, a turquiose eyeshadow and a pink eyeshadow, white eyeliner, turquoise eyeliner, bright pink lipstick and purple eyeliner (foe the purple and turquoise eyeliner, gel liners are prefered)
Start off with the turquoise eyeshadow, use a small blush brush to build the colour up in a spoldge on the outer corner of the eye, blanding it out into the cheek and up to the temple, now on the inner corner, do the same with the purple eyesadow and blend that towards the bridge of the nose. With the pink, apply it to the eyelid and blend up, adding more colour towards the brow, blend the colours where their edges meet.

Now grab a white eyeliner, line you upper and lower tearlines and cover your eyebrows in white too. For your lips, grab your pink lippy first and smudge colour into the center in an abstract shape, on either side apply your purple and then turquoise eyeliner (I find gel liner is often the best for the next bit) and blend where the colours meet at their edges.

Tada
See you tomorrow xx

Wednesday, 29 August 2012

Brown-ie points.

My cousin left her fashion book at mine last night, there were some leather boots that inspired me for this look, because I am into the browns at the moment, no idea why but whatever.
Anyway, for this you'll want to grab, a black pencil liner, a black liquid liner, medium shade of matte brown eyeshadow, a deep shade of matte brown eyeshadow, a dark brown eyeshadow and nude lipstick.
OK, firstly outline 3 diamond shapes in the black pencil liner, under the outer corner of the eye. Now apply the light brown shadow all around the eye and blend out into the diamonds. Now use the deep brown and shad the inner corner on the eye, and then use the darker brown over that. Darken the diamonds with the liquid liner by going over the pencil.
Now apply nude lipstick.
Nice and easy :)
Until tomorrow :)
xxx

Friday, 24 August 2012

A little goes a long way.

Proof ladies and gentlemen that you do not have to plaster your face to look pretty, our lovely model Shivani has kindly modeled once again for this blog to give my skin a break and due to a rquest for an easy day time look.
 All we used this afternoon, was some transluscent powder, light, medium and dark shades of an earthy brown matte eyeshadow, frosty pink blush, some black eyeliner, irridescent pink lipgloss and mascara.

Ok, first things first, your translucent powder, make sure your face is moisturised, let that soak in the apply powder with a large brush from your nose outwards in swirly patterns, now dust lightly your cheeks, from the apples of your cheek along the length of the cheek bone with a light frosty pink blusher. Apply eyeliner to your lower tearline, then smudge some more under your lashline a little. Slick some light brown eyeshadow all over your lid, then do the outer cornr in the medium brown and finish off with the dark brown eyeshadow in the crease, finish your eyes with some mascara. Now sweep some lipgloss on the center of your lower lip and rub your lips together to spread that evenly over your lips...
Tada :D
Till tomorrow
xxx

Thursday, 23 August 2012

Dolly Mix

I know the current season trend is for dark lips, milky skin and silky creamy eyes... but it's still summer!!! I'm saving that jazz for when Autumn kicks in, until then onwards with the candy shades because they are uplifting on rainy days like today.
So, I give to you a pink and purple dolly mix hues, a fairy fixing of glitter, frosted cheeks and some gleeful messings around :)
You're going to need a pale pink blush, black mascara, purple mascara, loose purple glitter, purple glitter liner, deep purple eyeliner, frosted pink eyeshadow, purple eyeshadow, powder foundation and translucent powder.

First things first, from your temple right upto your nose apply the pale pink blush and build it right up until it is opaque , blend at the edges so it fades to the natural skin tone around the cheek. Now apply frosty pink eyeshadow to your lids, and apply the purple shadow in the crease, blend the purple outwards past the eye and down to under the lower lashline. Now dust your face with the powder foundation down the nose, on your chin and across your forehead and blend slightly into the blusher at the edges where they meet, now lightly dyst everywhere with the translucent powder. Now coat your upper lashes with lots of purple mascara, and lightly spereate the lower ones with the black mascara. Now apply some purple glitter eyeliner over the purple mascara and dust some loose purple glitter over your cheeks and line your tearline with the purple eyeliner.
Now go have fun :)
xxx

Sunday, 19 August 2012

Sweet Dreams are made of this...

This is another health and beauty hint post :)
#3 Beauty tip
Beauty Sleep!
Oh blah blah you may say! I don't need 8 hours sleep! Let alone 6 hours or even 4! I can pull an all nighter and be fresh as a daisy! Well be that as it may, you just might feel fresh as a daisy but you won't look it! Sleep does not just make you feel better, sleep gives the body and your skin time to perk up from the hard days looking gorgeous. 8 hours is optimum for the majority of people, and by that it's the average persons recommended dose of zzz's you may need more or less. The way to tell if you are getting enough is if you are feeling tired when you wake up, you may have had a long snooze and a good lay in, but you still feel tired? You may be over doing the sleep, and you know yourself if you are under doing the sleep if you've had a late night and an early started and feel like a wreck!
If you find it hard to go to sleep you're like myself, I'm a tense person by nature I find if sleep is evasive, planting my headphones on my head a good way to relax, play a nice song that's not bouncy or energetic. If that isn't for you, lay in the dark, lay still as you can and take deep breaths, in through the nose and out through the mouth, close your eyes on the second breath and keep them closed and keep breathing, you'll find you just drift off. Scented oil reeds, warm bed time baths, bed time drinks like horlicks or cocoa, watching a film, reading a book or giving yourself a foot massage also are methods to help you sleep. If you try this and nothing works, see your doctorr, you may have insomnia, a condition where sleep is nearly or completely impossible and they can gove you advice from then on to help you sleep.
If you find you sleep too much or find waking up a real chore, then here's some methods we use with my brother who slept through an earthquake! Use more than one alarm clock and don't keep them by the bed where the snooze button is in easy reach! Buy 3 cheap alarms, and put them in hidden areas in the room, set them for 5 minutes after each other, by the time you have found them all and switched them off you should be awake! Ask your parents or roomates for a wake up call if they are up before you, it can be annoying, but if they have woken you up and got you out of bed then it works. Another couple of wake up methods involve leaving your curtains open, our bodies are evolved (or created) to wake up when light hits our eyes, sunlight is especially good at this, so leave the curtains open and you should wake up with the light of the sun filtering through your eyelids. You could also try sleeping with a thinner duvet, or buying a "teasmade" or timed coffee machine to have a great smelling drink ready nearby to wake you with its aroma. If you are still finding it hard to wake up or do not feel as though you are getting any gain from sleep, go to a doctor, it may be that you have some underlying or hidden problem preventing you from becoming refreshed, depression is a main culprit for this, as is stress so go seek help.
So all being well you'll sort your sleep problem out, and as a new student nurse I face shift work and will have to learn how to manage sleep around that, but fear not, I will and will report on how to do that while you, my angels, sleep soundly and wake feeling good, looking good and having good times.
Sweet dreams
xx

Friday, 17 August 2012

Golden Girl

I GOT INTO UNI AAAAAAAAAAAAHHHHH I'M GONNA BE A NUUUURSE!
Oh gosh I'm so happy! So to celebrate I am doing something golden sparkly for to make known my happy happy joy :D
Anyway on with the tale I'm all shiney and I attempted to make it all ethereal, but it doesn't show in the photos I'm afraid, ah well, one day, one day I will have a fancy camera that takes more good photos than bad... or are the photos the fault of the photographer? Mull that one over kids!
Here we go, you need a gold eyeshadow and an irridescent gold eyeshadow usch as G4 (plain gold) an G3 (irridescent), and pale gold lipgloss, mine was an MUA on in shade 1.
Ok, get yourself a small powder brush and dip it in the gold eyeshadow and colse your eye, then sweep it over your eye to your hair line, deepen the colour by repeated appliucation of the eyeshadow make sure you get the inside of the eyelid, the dip between your eye and nose and upto the eyebrow. Do this for both eyes. Now grab another small powder bruush and dip it in the other gold and sweep it all over your face, paying especial attention to your nose, your temples and cheeks. Now grab an eye shadow brush and sweep some of the irridescent old around the eyelid.
Now slick on a few coats of gloss to build up a sheen on your lips worthy of a sun goddess :D
Now scrape your hair up in a high bun, spray it with gold glitter and gems, wear a yellow or gold outfit and you are the sun :D Go partay!
x

Monday, 13 August 2012

ice ice baby!

Something sparkly for today because I haven't posted in a while, and I have no excuse for it :P
Pale silver and medium sliver eyeshadow (si1 and si2 coded for the mnly palette in a previous blog), silver eyeliner (barry m #11), mascara of your choice, all one length medium thickness black false lashes, silver glitter eyeliner (mine's collection 2000 glitter gel liner in #4 "hustle") and shimmer body puff (i used urban decay cherry lemonade body shimmer).
Now then, firstly line your eyes in silver liner, all the way around top and bottom lash line. Make the top lash lines eyeliner thicker though. Now apply light silver all over the lid upto your brows, then apply the medium silver in the crease and blend it upwards. Take a small powder brush and swirl it in the light silver eyeshadow and dust that all over your face, then dust some medium silver over your cheek bones. Apply your false lashes to your top lashes, then sweep a small amount of glitter liner near your tear duct on the lower lash line on both eyes and bottom lashes. Apply mascara onto your upper lashes to bond your lashes to the false ones. Apply some silver eyeliner to the inner lip and blend outwards, now dust face all over with shimmer powder.
Tada :)
Enjoy being an ice queen my darlings
xxx

Wednesday, 8 August 2012

Feeling a little blue?

Not to worry! I have a look that will match that mood :D
The other cousin, Katie asked me (after many changings of her mind) to do something blue on my lips, dark and light blue so I did and this is the result:
Her favorite colour of the moment is blue. So here I am blue as can be :P
Anyway, this lipstick (is not actually lipstick) is super easy to do, you just need a dark blue eyeliner, like one by Barry M #6 and a pale blue body crayon, like the ones from claires accsesories body crayon pack in the rainbow colours.
The tutorial is also super quick, you line your lips with the dark blue and fill in the inside gap with light blue. Grab an eyeliner brush and blend gently at the edges. A quick look for a bit extra attention on a night out ;D Seal it with lipcote to make it last.
tada
xx

Tuesday, 7 August 2012

Sweet like Chocolate :D

This brings me so much joy, it's sweet like chocolate jooooy... ahem.... moving ooonn..
OK this look was requested by my cousin Evie, tomorrow Katies nagged me to do a look for her ;D
Anyway, this look has lots of rich brown in it, and here is what you'll need, a gold eyeshadow (urban decay half baked), dark brown (urban decay twice baked), cream eyeshadow (urban decay midnight cowboy rides again), and light gold eyeshadow (urban decay YDK), light bronzer, pale gold eyeliner (avon gel liner in golden fawn), beige lipstick (collection 2000 cream puff lip cream in angel delight #4) and golden glitter.

Firstly use the cream eyeshadow in the inner corner for a quater of the eyelid, then light gold from the cream for another quater, then the gold for another quater and then finish with brown. After they have been applied, just blend the colours at the seams. Then apply eyeliner all around the eye, top and bottom lash line. Now apply lashings of mascara if you want. Now grab a large brush and apply bronzer lightly on your whole face, then layer a little more on your temples to deepen the tan slightly. Now dab some glitter under the lower lash line and apply lipstick.
Tada :D
xxx

Monday, 6 August 2012

Green eye monster

Ok, not as smokey as I had hoped, the colours just dind't work out but it's still a pretty sweet look :)
You're gonna need 3 shades of green eyeshadow, a dark green, medium shade of green and a light green (I used gr8, 9 and 10), mascara and medium or dark green eyeliner.
Super duper simple once again, here we go:
Light green eyeshadow all over your lid, then medium green in the crease and then dark green on the outer corner, blended into the light green and smudge the dark green outside the lid to look smokey and cool.
Now line your upper lash line and the outer half of the lower lash line. Now slick on some mascara :D This can be done in any colour you wish so have fun experimenting!
Done and dusted :D
Too simple, maybe need to get something more complex on so we have more to talk about next time?
Hmmm, ah well
xx

Sunday, 5 August 2012

Out striped :D

My attaempts at nice photos are failing again ah well, I might enlist some help next time though I don't see anyone being available everyday to photo a look for me :/ cé la vie.
Well anyway this ones a bit of an 80's style (in terms of manic brightness and crazy blush).
Anywho, you'll need; red, orange, pink, purple, green, blue, silver and turquoise eyeliners (all mine are barry M), also yeellow and coral eyeliners (mine are from sleek), stick concealer and pink blush (also sleek)
OK, just apply foundation as you usually would, and then cover your lips in concealer to blot them out, then apply blusher over your temples and down to your cheek bones, building up cover until it's bright and blend. Now line one eye all the way around in pink, then draw lines vertically on the other eye. Space them out and put the colours on as you want them for a bit of a change from the usualy rainbow line up. Tada.... Super quick :D
xxx

Saturday, 4 August 2012

Some 50's thing

OK, I'm majorly bored and stuck in cause weathers being weird so here is another post, belated and for you :) Also, prepare yourself, there's about to be some artsy photos, because I got bored with my usual point and shoot pratting around and went greyscale and dramatic. It is about time I put more effort into taking photos me thinks.
So, you'll need to grab yourself a coral lipstick (I used Kate Moss for Rimmels lipstick in #12), black eyeliner (I used a liquid liner, benefits magic ink in black), rosey pink blusher (i used sleeks blush in flamingo), lipcote, a stick concealer, eyebrow pencil in your eyebrows colour (I used my trusty rimmel one in dark brown), w7 camouflage kit and collection 2000 loose powder.

Now then, firstly we gotta eliminate any under eye darkness combine the colours in the camouflage kit to match your skins natural colour and tap that under your eyes lightly and blend with your fingers then set with the loose powder using a small powder brush. Now slick some of the stick concealer onto your cheeks and forehead and blend it into your skin using a foundation brush and when it's blended in and you've got rid of any patches set that with the loose powder using a large fluffy powder brush. Now grab an angled powder brush and pick up a tiny amount of blush sweeping it over your cheek bone, building up colour until your have a rosey flush, blend the bottom egde of your blush downwards to soften its edge. Now fill in your brows with your pencil and line your upper lash line with black liner getting thicker starting thin on the inner corner and gradually getting thicker until you reach the outer corner and leave it blunted, no flick. Apply stick concealer to your lips and blend it, then fill in your upper lip with coral and press your lips together, not rubbing them together, open you mouth and follow the marks left from the upper lip to make a smaller poutier mouth than your natural mouth, sharpen the line by carefully applying the lipstick. Then blot your lipstick, reapply and then coat in lipcote. If you like slick on some mascara, but I didn't.

Thursday, 2 August 2012

The Dark side...

OK then, got some gothic goings on going on tonight :D Good for going to themed parties or just being gothy when you feel that way out :P
You're going to need a brow pencil one shade darker than your brows if you are light haired, if you're dark haired use a pencil in your brows colour. Black eyeshadow like Bl1 in the Manly palette (for the code I use check out the old post with it on), black eyeliner like Barry M's #1, a grey eyeliner like Barry M;s #26, purple mascara like Barry M's lengthening mascara in electric purple, a normal black mascara use whichever you prefer I use Maybelline blackest black, silver glitter liner mine is colllection 2000 in hustle 4, black glitter liner mine is collection 2000 in rock chick 7 and last but not least the black lipstick I've used Barry M's #37.
On wards then. Fistly you may or may not want to pale yourself up, the how to is simple, put your foundation on as normal then powder puff talc onto your face to go paler :D
Just fill in your brows with a bit of brow pencil to darken them up and add definition to start off. Now you want to line your eyes, line the upper lash line with a medium line of grey eyeliner from the inner corner to half way into the eyelid, then do the rest with black liner. Now line the lower lash line with black liner from the outer corner to half way in, then use grey eyeliner to finish the line off into the inner corner and finish with a small downward flick angled towards your nose. Smudge the eyeliner on your upper lash line with an angled eyeliner brush. Now grab a stiff eyeshadow brush and pick up a small amount of eyeshadow on the tip and work it into the crease of your eye smudging it outwards to form a shadowy halo around your socket and slightly under the lower lashline; then apply purple mascara to the inner half of your lashes top and bottom and then the outer lashes in black. Now grab the black glitter liner and streak a dab along the outer part of the lower lashline, following the black eyeliner, now grab your siler glitter liner and sweep some on the upper lash line on the inner corner.
Now your lips... Black is tricky because of the nature of the colour, any mistake is going to be easily spotted like when doing red lipstick, so grab the black eyeliner again and with great care line your lips and fill them in with the black eyeliner, then go over it in the black lipstick carefully to avoid slipping and don't smack your lips eiether until you have applied a sealant like lipcote.
And you're done :D
I'm not being a wannabe nerd goth, I do acctually have to wear glasses I'm blind as a bat xD

Tuesday, 31 July 2012

Sad times.

No post tonight, I have done a look, but things (boyfriend shaped things) are making me sad so I am really in no fit state to be writting about being pretty when my face is all blotchy from being upset :(

Monday, 30 July 2012

My Boyfriend made me ill -_-'

OK, so he  has been sick with a tummy bug for a few days, and silly me brushing up on my future nurse skills went to his aid... Oh boy did I fail, I caught the tummy bug too, not as bad but I'm just a mess so I am posting a beauty tip until my face changes back from the charming palid state it is currently in :(
BEAUUUTY TIP #2
Clean untensils!
What is she talking about? I hear you mutter, but fear not I have not gone mad and I am not about to talk about cutlery or about spatulas or things like that. I am talking about make up utensils, which means your brushes, your sponges, your lash curlers, your blending palettes and your hands, 8 fingers and 2 thumbs.
These are your essential pieces of kit to achieve looks that smack people in the retinas as you walk by, brightening peoples lives with your lovely visage. However, they can turn nasty if you do not take care of them, the gross fact is, our skins surface is always renewing itself... so deadskin and gunk falls off it regularly, no matter how  hard you scrub, it happens and it builds up on your brushes and what not, this needs to be cleaned off at least every fortnight or once a week (I do mine once a week, very theraputic actually). Not cleaning them means, when you rub them in your make up you get the face debris in your make up this then goes back on your face, clogs up your pores and gives you pimples :P
How to clean your brushes... You can get specialist brush cleaner, but it is expensive and baby shampoo works just as well, squidge some into the soap thingy on the side of your sink, onto a tile or palette, then wet the brush under warm running water, swirl the brush in the shampoo to make a foam rinse and repeat the whole thing again with fresh blob of shampoo until the foam stops turning the colour of whatever make up was previously on your brush, give the brush a final and thorough rinse to remove all soap, reshape the brushes bristles and leave to dry on a piece of paper towel somewhere sunny like a windowsill.
In terms of your hands, before you apply make up, give them a wash, make sure you get under your finger nails and everything, do the lot, make it a good all round hand wash and a good thorough dry and you'll have no hidden muck on them to creep into your pores and spoil your lovely face or your precious make up.
It's simple, keeps your face clean, keeps your make up clean and prevents pimply doom :)
xxx

Thursday, 26 July 2012

Ever stay, never bleed lipstick :D

It's a real pain in the patootie isn't it, when you're out for whatver eason all dolled up and next thing you know, you're looking in a mirror and your lipstick has bled out almost to your nose or has faded to resemble lipliner more than lipstick...
WELL NEVER FEAR FOR I AM HERE!!!!!!!!!!!!!!!!!
And I am gonna show you how to keep that pouty perfect just applied look all day :D (or at least till you take it off)
Firstly you'll need your self som basic equipment, grab yourself a concealer, preferably a solid one like those shaped as a lipstick I use a W7 cover stick, the one with teatree oil in it, some lipcote, and (this bit's optional) a lip stain in a similar colour to your lipstick.
This I have diagrams for, cause I can :D
OK then Firstly grab your concealer and lliberally line round your lips with it like so:
Then smudge it all into your lips, it acts as a primer and tones out your lip colour to make the one you're applying pop! This also stops the lipstick from bleeding out and gives it good staying power:
Now if you want, or have it, apply your lip stain over the concealer, it acts almost like a colour hold, it just prolongs the colours wear and emphasises your chosen lipstick:
Now apply your lipstick and a liberal coating of lipcote all over your lips and just past the edge of your lips to avoid it wearing off during the festivities :D
Now go forth and party :D
xxx

Monday, 23 July 2012

Transition

Soon I am endevouring on a big and scary path to potential madness.... I am having my thick curly hair cut short...  or am I...Oh I just don't know :/
Anyway, tonight I'm going to give my beauty rules ago...
RULE #1
KNOW YOUR SKIN!
Got you didn't I! I bet you were expecting something like "cleanse, tone and moisturise" but what is the point in that if the products you are using are not right for your skin and making your skin suffer rather than making it happy!?
So knowing your skin is essential, it tells you what skin type you have which is generally seperated into these groups:
Oily where your skin is shiney especially on the t-zone (the nose and forehead) and prone to pimples and out breaks.
Dry where your skin is prone to patches of dry skin, especially on the cheeks, your skin may tend to be dull aslo if you do not keep a good routine up leading to dry skin build up.
Normal, where your skin does not suffer from dry patches or excess oil on the skin, tends to be fairly supple and much envied.
Combination where you have that crazy mix of dry skin on the cheeks and oily skin on the t zone (my brother has this type of skin) which makes finding a product that truely works a hassle.
Sensitive skin is prone to any of the above group characteristics and is only classifyable when you use harsh or unsuitable products, sensitive skin goes an angry red colour when products disagree with your skin, it also means you are more prone to pimples because your skin is not happy with your products.

How do I tell which one my skin is though? Take time with your skin, have a day where all you do is use luke warm water to wash it in the morning and DO NOT WEAR MAKE UP!!!!!!!!!!!!! Take the tips of your fingers at the end of the day or by lunch time if being barefaced is killing you and run it over your t zone, over your cheeks and around your eyes. How does it feel?

If it feels like your sweating/greasy on your forehead or that it has a shine to it while the rest of your face feels pretty ok, then you have oily skin, look for products designed for oily skin, and be gentle! If you aggrevate your skin with products that are harsh then you'll cause your skin to produce more oil leading to a breakout which is not cool! And remember a little oil on your skin is fine, it's what gaves us a shiney healthy glow way back when we lived al fresco in our birthday suits and it keeps our skin moisturised naturally.

If your skin feels slightly rough in places and tight, sore or itchy then you have dry skin, buy products with built in moisturisers and up your water intake. Do not use strong, perfumed, colourful or harsh products on your skin because it will strip your skin of the little oil it has cinging to it use gentle soothing products that are perfume and free of anything artificial that you do not need. NEVER EVER USE SOAP ON YOUR FACE it dries your skin out like the sahara sun! And moisturise liberally, I recommend a rich moisturiser on a night to soak in and have your skin moisturised in the morning and a light long lasting skin qunecher after you have cleaned up your face for the day. Also stay away from hot water, use luke warm water on your skin, hot water strips the skin of the oils it needs too so be gentle with yourself, you're a delicate rose of a skin type, you need TLC!

If your skin feels soft, not rough anywhere, not overly greasy or tight or itchy then congratulations! You have normal skin! Now just to keep it from falling into one of the other catagories :P Stick to products that are designed for normal skin, never be tempted to buy anything other! Also, like with dry skin, stick to luke warm water when washing, your skin obviously has enough of its oil on it to keep it healthy but using hot water will strip that off and leave your dry. Other than that your skin seems to take care of itself pretty fine on its own, just keep it on the right track to supple skin success!

Your skin feels greasy and has some pimples on the t zone, but everywhere else is feeling a bit dry and tight, tchy and rough? Your skin is combination, which is a tricky one, but again, the beauty industry is a clever machine and has churned out many a fine product for you to use in the quest for sexy skin :) As well as having a good mooch down to your chemist or skin care stockists to find the bottles labelled "combination skin" drinking more water, using gentle products designed for you and not scrubbing your skin (it aggrevates it like crazy kay?).

Your skin feels a little too smooth to be normal, looks shiney, feels a little tender to touch? Your skin is sensitive. Now then like everyother skin type, now you know what you have get the right products! Get products like the simple range that are free form any ingredients known to aggrevate skin and make it tender! Avoid the sun! If you are a tan-a-holic I appologise but really, there are bronzers, self tans and spray tans you do not need to expose yourself so willingly to the sun to go bronze. Also, be careful with hair sprays, use a free hand or a shirt to cover your face when spritzing your barnett to oblivion to make it stay where you want it. Also, when taking off your make up, don't use baby wipes, use proper wipes which are for sensitive skin to minimise any risk of aggrevation.

So now you know skin types and the care types of care they need :D
Might make this a once a week thing or just when I cannot get together some material to post :) I dunno, but enjoy.
xxxx

Sunday, 22 July 2012

Hermionie Granger too school for cool :)

OK NEWS FLASH LUSH HAS BROUGHT OUT ITS COSMETIC RANGE EEEEEEEEEEEEEEEEEEEEEEEEEEEEEEEEEEEEEEEEEEEEEEEEEEE
EEEEEEEEEEEEEEEEEEEEEEEEEEEEEEEE
https://www.lush.co.uk/emotionalbrilliance/ It is taking every ounce of my self control not to buy everything there it is just so amazing! Also, my bank balance right now does not stretch to buying a full range of ecological, skin friendly make-ups that I would sell my entire music and CD collection to own... no... too tempting.
Anyway, lets calm ourselves from excited screaming and arm flailing, we have work to do, mainly that of transforming ourselves into little intellectual godesses or gods :)

Here we go:
Fistly you want a sheer coral lip colour like Avons shine attract lipstick in guava which is what I used, soft grey eyeshadow (I used Urban Decay in mushrrom), volumising mascara such as bourjoise volumiser mascara, dark pink blusher (like sleeks blusher in flamingo), highlighter powder (mine came from the Ruby and Millie palette I own) and coral lipgloss (I have Barry M's lipgloss in #9)

Firstly, apply the eyeshadow, apply it only on your eyelid and layer colour to make it really rich and shiney, like molten metal on your eyelid. Then dab a blusher brush onto your blusher, depending on how bright the blusher you use is, if it is not very bright, build up colour sweeping from the front of your cheek, by your nose, to your temple over and over until it looks like you're slightly pink, as if from running around :) If your blusher is very pigmented and therefore super bright, dab a tiny amount on to the front of the cheek by the nose and tap off the rest from your brush, then sweep the brush up and down to your temple and back to create a wash of colour.
Now apply highlighter just above the blusher lightly over the cheeks and more concentrated over the temple. Then apply lipstick, to get a nice glazing of the lipstick, apply the lippy then blot, repeat 3 times to build good colour, then apply a wash of gloss over that and sweep off excess with your little finger. I've left mascara until last because it gets in the way of your eyeshadow application otherwise and is the finishing touch, make sure you have a good fat brush for the mascara and apply two coats to your lids, using a brow comb to seperate lashes after each coat and you'll look like a brainy know-it-all before you know it :)
This has been my last potter post guys! Oh well, on wards to more miscellany now :) have fun, be fierce and colour your face in :D
xxx

Saturday, 21 July 2012

Just Dumbling along.

Yay I'm back from my suprise sleep over with my little cousins... hadn't originally intended to stay there but oh well :P
Tonight as well as my posts intnded look, is the make up I did for my little cousins school disco she looked preeetty :D
Oki doki, here is what we used to get a dumbledorey look, I pickd up on his opulance, he was always seen in richly coloured fabrics and metallic trims. A truely wizrdly wizard :)

Gold eyeliner (Mine was achieved using Avons colourtrend transforming eyeliner to turn the manly palettes G9 into an eyeliner), metallic red eyeshadow (I used R2 in the Manly palette I've coded), gold glitter liner (Mine is collection 2000's funk #3), clear mascara (again, a collection 2000 item) and shimmering body powder (mine is Urban Decays cherry lemonade powder you can lick it! IT TASTES AMAZING! Ahem... tangent).
Ok, firstly, coat your lids in the red, layer up the colour for as much depth as you can, then apply your gold eyeliner thickly on your upper lash line and then, instead of flicing it outwards, swirl it outwards as much as you like I've done 3 swirls. Now dot some gold gliter among the swirls and line under your lashline with gold glitter. Slick your clear mascara on your lashes. Grab your shimmer powder, and if you've got a powder puff if not use a kabuki or large powder brush to apply powder around your eyes.

Simple isn't it :D
Anyway chickas, tomorrow is Hermionie :)
This is my cousin going to her dance, she's stoked to be on the blog xD
TADAAAA am I a lovely cousin or what ;D

Thursday, 19 July 2012

Harry Potter :D

Oki doki :D tonight for your viewing pleasure I bring Harry Potter :D well... sort of :)
I brought Harry inspired make up instead, lightening bolty and sparkly good fun :D
OK, for this look grab yourself some red tinted lipsalve or gloss (I used a lipsmackers lipbalm in strawberry fanta... tastes so goood), highly pigmented black liquid liner (I have benefits magic ink its  very dark and very precise), a shimmering red eyeshadow (Mine is R4 from  my coded manly palette), a gold eyeshdaow (G4 from the manly palette) and gold glitter eyeliner (I have collection 2000 glitter gel liner in funk #3)

Ok how to, fistly draw a thin line of black liner on your upper lid, start in the middle of your lid and move to the outer corner, then complete the line by starting at the inner corner and drawing to meet the line starting in the middle :). then extend the line past the outer corner about a centimeter or the width of your thumb nail, then where that ends draw a slanted line upwards towards your eye and then where that ends draw another shorter horizontal line outwards. Start another line of eyeliner a little way above the original line, begin it around a third of the way into your eye lid and draw a straight line parallel to the one below it, copy your lines for the lower half of the lightening bolt to make a complete bolt :D do this for both eyes.

Now fill in the bolt with gold glitter and grab an eyeshadow brush, apply red into the crease starting at the bolt, above the top line and apply right until you reach the inner corner of your eye, now, below that, in the gap between your red shadow and your lashes, apply gold. Now sweep your lipgloss/ lipbalm whatever onto your lips.

Oki doki, tomorrow could be dumbledore or Hermionie... tweet me which would be cooler :D
xxx

Tuesday, 17 July 2012

Go go Gryffindor!

Welp, this has taken too long to do! Searching for my eyelashes has been a chore :( I have these amazing gold flecked falsies I was determined to use for this look, and during the change over between little box and big box I must have misplaced them. NOT FOR  LONG I found them again ^_^ In the Ruby and Millie Palette :)all is well and the post can go ahead.
So, here's what I used a pair of eyelurs girls aloud lashes, Cheryls (the ones with the gold flecks on them), pale gold eyeshadow (I used G1 from myu coded Manly palette), a golden eyeshadow (mine was G4 from my coded Manly Palette), red eyeliner (I used Barry Ms #25) and a gold lipstick or lip crayon (I used the golden body paint crayon frome the non rinbow pack from claries accessories).
Oki doki then on we go! Firstly you want to line your eyes, start at the outer corner and using the broadside of the pencil line a little way into the lid, then taper the thickness of the line outwards into a flick, and inwards down to the corner of the eye. When you get to the corner of the eye, use the braodside of the pencil again to shade the tear duct area. Then carefully apply false lashes. After that, shade all of the lid up to your brows with the pale gold eyeshadow and then shade in the crease with the more solid gold colour.
After that apply your gold lipstick or whatever it is you're using to create a golden hue upon your pout. :D

There we have it, after all that time searching for my lashes :D Tomorrow satarts the characters and the beginning of the end.
xxx

Saturday, 14 July 2012

Cho Changtastic

Sat  here blogging to you, wearing a nice face mask and chilling out :D Sounds like the life doesn't it!
Anyway here's the dealio this is what I used:
a pinky-reddish blusher (mines sleek make-ups blusher in flamingo), coffee coloured lipstick [think latte not espresso!] (mines collection 2000 cream puff lip cream in angel delight), bronze or copper eyeliner (I've used #29 Barry M) and brown eyeliner (mine is another Barry M #2).
This look is quite relaxed, feminine and unlike some other looks I have done, a nice day time or evening look. Quite respectable really haha.
See :)
OK, now how to do this, apply your foundation or base however you usually do, there is a post further back on how to get a flawless complection on here, so do check that out :). Once you have your base, sweep on some of the blusher lightly, tap off any excess from the brush to avoid looking like you have just run a million miles. Then apply the bronze or copper liner half way across your upper lid, sticking close to the lash line and gradually thicken the line a little until you are satisfied, then where you left off with the bronze or copper pick up with the brown and blend where they meet, flicking the liner up from the outer corner. Now line as close to the lower lashline as you can and blend it to look smokey, then apply lashings of your best loved mascara to your lashes. Now apply your lippy blot, and reapply, if you want your lips to last, apply some lipcote, it works wonders :D it has saved me trips for reapplications on many a night out.

Enjoy, next is my Hogwarts house, Gryffindor, till then my darlings
xxxxxxxxxx