Thursday, 31 May 2012

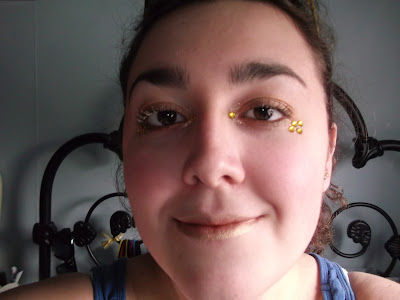
This has a certain Aurora about it xD

MWAHAHAHA PUN!Well, yep todays look is based on the Northern Lights or Aurora Borealis, so we have lots of soft colours of blues and green and purple :)
Hope it does them justice :)
I used plenty of shadows this time again, but really I'm enjoying the layering at the moment, the dimensions given by doing this are just awesome :)
OK, here is your list, I'm afraid to say I used one of my limited edition colours on this so forgive me, Flipside from my Urban Decay Book of Shadows 2 (just use an irridescent turquoise, it works just the same). And from my 120 palette, T10, T7, B2, B5 and Pu6. I also used an eyeliner Barry M's kohl pencils in #13 turquoise.
Ok, start with Flipside or your irridescent turquoise, and use that as a base colour all over your lid, then use T10 ontop of that to enrich the colour, use a regular eyeshadow brush for this, it's better than fingers or sponges which won't work so well as they'll drag more colour off than they put on. Now for the rest of it, use an angled eyeliner brush and start with T7 line a little colour under your lower lash line from the outer corner up to a third in and then  randomly draw lines of colour across your eyelid, no more than 3 lines should do it, then with B2 and B5, draw more random lines on your eyelid, and the same with Pu6 and then from the inner corner line a third of your lower lash line with Pu6, leaving a gap of about a third in between the 2 colours on your lower lash line. Fill that gap with the eyeliner.
Tada :D
shimmer, shiney, stellar :D
enjoy it my starry eyed friends
xxx

Happy 166th Carl Fabergé!

It was Carl Fabergé's 166th yesterday, so I though in honour of someone who created some truely beautiful things I should create a look inspired by the eggs he is famous for:
https://blogger.googleusercontent.com/img/b/R29vZ2xl/AVvXsEggriWmanN-lp6S8A7EOFqJH-P2l4SFneARDZgRoh4LvscnfjEB0l-RbIZJvVAGh8osGH9uCvUQ_23pKPFB6YACyVPSB1d2D9sNL0SHz-2D7XkRVHRLA6TGKj_FQ6SpzL5bIThfjEGR4YfA/s400/Faberge-Egg.gif
It's alot of different shadows on this one to create the desired rich lapis lazuli blue, but I think it's worth it, and I recommend using a liquid liner for the gold detail, I don't have one yet, I'm waiting for it to come through the post so :P
Ok, here is the list for eyeshadows:
From my 120 palette: B5, B7 and Pu6, From my Urban Decay collection Jinx and Flipside (I haven't seen them lately, so I think they may have been limited editions or discontinued?) and the dark blue from my Ruby and Millie palette yep... 6 shadows on my eyes :D
Then I just used my avon supershock gel liner in fawn to make the pattern, only it's not a strong enough gold, so seriously, do get a liquid one, Barry M has a nice one :) Anyway here is the how to
start with the 120 palette, use B5 fisrt over the lid, then B7 then Pu6, these are fine to be swept on with a brush, and blended into one colour on the lid, then take the blue from the ruby and millie palette and blend that in too. Now get Jinx if you have hold of it, or a shimmering mid blue if not, and tap that on top of the lid, and then do the same with flipside, put PLENTY of that on, if you can't get hold of flipside, use an irridescent turquoise. Just thought.... I am wearing clothes in this picture HAHAHA just my face was so close to the camera you can't see anything but my shoulders xD
Like I said the gold is appauling and I'm sorry... but I do my best with what I've got, the gold is simply done, It's a fish scale pattern, starting from the lash lline, make little joined up U shapes and the stack them up in a staggered way with the next row of U's middles over the points between the lower U's like this
UUUU
  UUU
If that makes sense :)
Happy glamming kids
xxx

Wednesday, 30 May 2012

Vampirella

Not a sparkle in sight here, not for gothic-vampy looks, so as to eschew the "I am a sparkly prancing vampire" label that seems to land smack in the face of goth+glitter haha
I've attempted the cut crease method here, a note i would say for girls or guys using this method, don't do what I did, i sugest wetting the brush slightly to do this so the lines remain crisp as dry powders smudge much more easily... which is what mine did so the cut was not as sharp as intendid as you can see:

Ah well, I know for next time to pay more attention :)
It's not a hard one to do this, so don't worry, and you can add glitter if you want I'm just majorly anti-twilight x).
You want a black eyeliner (I use Barry M of course, #1), black an purple eyeshadow (I used colours Bl4 and Pu9 from the palette I always use :~) )
Here's how to:
firstly, take the black eyeliner, and where the crease of your eyelid is (that bit which is the fold when you open your eyelids... ) draw a faint line to mark your boundry.
Take an eyeshadow brush and keep it dry to apply the purple on to your eyelid, build up the colour until you're satisfied and blend a thin line of purple under the lash line. Now for the black, clean your brush and dampen it with a bit of water, keep it just damp so it picks up colour easy but doesn't soak everything, and where you made the line with your eyeliner start there and apply the colour above that line and blend it out thinner at the inner corner and thicker at the outer corner. Blend this out so the edge is blurred.
If any excess powder strays on to your purple, just reapply purple over it :~)
Add lashings of mascara and add black or purple glitter over the mascara if you like :~)
You should complete, for a full goth look, apply white foundation, or my preferred white facepaint using your fingers gently over your face like in the ancient greek tutorial and slick on some purple or black lipstick (for purple use the claires body crayons, they're easier to apply)
And you're done :D
xxx

Monday, 28 May 2012

Sunset sonata

The sun is STILL shinig and I am getting broooonze :D So pleased with this weather! hehe anyyway, on with the look:
In honour of that blazing ball in the sky, which provides me with vitamin D here's a sunny candified orange/yellow look to usher in more of this glorious weather. Well here we are:
What to use:
From the 120 palette, use Y3 and O5 and grab a bronzer to suit your skin tone, remember those of us with pale complexions, go for a light bronzer so as not to look orange, and those with darker skin, go for a deeper bronzer because a light bronzer will only look like a highlighter on the face which is not the aim of a bronzer ;)

Righty ho, lets get thos show on the road, here's how to:
With the orange, wash over your lids creating a strong colour, if it looks pale just build up the layers of shadow until you're happy, using a brush or applicator sponge makes this less of a problem. then from the crease of your lid up to your brow, shade in the yellow, make it deep in the crease and fade out to the brows to look like the rays of sunshine :D
Now grab a big fluffy brush and take a small amount of bronzer and quickly dut this all over your face to get a golden dewey glow. Great for days at the park chilling with your besties, or for an evening out in the dying daylight.
toodles dears xxx

Friday, 25 May 2012

Candygram for blogger.


Right first off shout out to my friends who I am owing massive thanks to! Sandra Zasada, the next top UK radio DJ for the recomendation and the help in getting my blog out there and to Katie Trevor (check her out on fb she's KayT a very talented musical maestro!)
Onwards to my next piece Candy colours, I might do a series of these because it's summer weather and candy colours look superb with glowing summer skin :) so while I write you this I will think up another set of candy colours to pop on here tomorrow, I'm thinking sorbet?
For now we have sugary green and pink grapefruit pink :D styled on those from the bourjois adverts :)
it's easy as pie this one, you'll need Gr5 and P6 from the 120 palette coded for on this blog. I don't think I've mentioned it before, you people looking for the palette, it's on light in the box by a company called "Manly" which is funny isn't it? about £20 with p&p.

Anyway I digress, simple method, firstly to just the lid apply Gr5 and layer it up to a bright green, then in an arc over that use P6 like in the pictures to halo the green. Then just wash your face with a swish of bronzer and layer on some mascara and you're done :D simple
Simple, summery, sweet
tada!

Tuesday, 22 May 2012

Flawless skin.

Ok, this is an odd one for you tonight as I will ot be listing many specific products. This post is a out flawless skin. I try to make sure, every post I do, be it eyes or lips or a full face that my skin looks its best before I set out to show you what I've got to offer you, so now I'm going to show you how I do it.
Tadaaaa
Firstly you'll want to make sure your skin is clean! If you want just go over your skin with a baby wipe if you have had no make-up on today like myself because it's a hot day and make-up is stifling in the heat. Then moisturise, you'll probably have your own preferred moisturiser, make sure it suits your skin type, if it's oily use a mattifying moisturuiser to cancel out the effects of oily skin, for very dry skin like mine use something NON-oil based because our skin doesn't need oil it needs water, I love benfits triple performing moisturiser it's oil free and like most moisturisers has an SPF of 15. If your budget is not able to stretch to benefit, Johnsons daily essentials hyrdating 24 hour for dry skin is lovely and doesn't feel heavy or make your skin feel clogged and for normal skin, Johnsons also do moisturiser for normal (combination) skin. Give that 5 minutes to soak in, because if you aply right over freshly moisturised skin it sinks in with the moisturiser, looks patchy and causes spots. Once you've waited about 5 minutes, go back and apply a base, I like Avons magix perfector, it suits any skin type and any skin tone from my pale English nerd complexion to my friends gorgeous African complexion because it has no colour pigment in it, it mattifies and evens out the tones of skin and minimises pores like wow! Now for your foundation, I like to use a powder personally, but whatever product you prefer get a brush! I use Bourjois mineral eclat powder in vanille and a kubuki brush to apply it with, when it comes to powders apply in circles from the center of the face outwards, for liquid, mousse, cream and "liquid to powder" foundation, use a foundation brush and in short sweeping motions from the center of your face work your foundation outwards using a minimal amount of product that you have made sure is the right colour for your skin, a way to test is, get a pocket mirror and go into a shop, fnd the foundation you think is closest to your skin tone, get a blob of the tester on your finger and pop back outside and test it in natural sunlight on your jawline. You may look mad but you'll look beautiful later on when you have flawless skin and testing it in natural light is better than in the yellowy shop light. Now once you've got your face covered lightly, get some translucent powder, I like collection 2000's loose powder in transluscent #2 it's silky smoooth, get a large powder brush, get some on the brush and tap off the excess and then sweep the powder over your nose and forehead then your chin and cheeks, it evens out your colour and mattifies.
Now for blusher, or bronzer, optional, choose a blusher that's closest to the natural flush of your cheeks, latin skins and olive tones, use darker rusty reds and plum reds (that rich purply red) sparingly of course, you don't want to look like you just stepped out of the 80's xD for light skin tones like mine, choose rosey pinks with golden tones in it and peach colours, they are light, soft and suit your skin tone beautifully, for medium to dark skin, use corally reds, and toned down reds, use your blush sparingly.
For bronzer it's simple, you get light and dark, dark sin tones, from olive to dark, use the darker bronzer, for porcelain to light olive tones go for the lighter bronzer no matter how good you think it may look don't go for the dark you'll go orange! to apply either blush or bronze, get a large brush, and pick up a little powder, for loose powder, tap off excess for compact powders swirl the brush round two or three times to pick up the right amount and smile big! Show all your teeth and that part of your cheeks that juts out the most, start there and sweep the blush backwards, build up a light layer of colour with 3 or 4 sweeps of blush to get that glowing look. for bonzer wash across your nose, temples and chin with the bronzer lightly so as not to over do it and build up colour slightly to give yourself a glow. And done :D
Now go and work it!

Monday, 21 May 2012

A little bit RAWR

Welp, heres something of a staple for me, animal print, done zebra and tiger so far and now for tonight I've got leopard!
It's reaal easy to do and needs only 4 products!
What you need:
Black eyeliner pencil I use my Barry M one, the shade Br5 from the 120 palette, Bronze eyeliner I used Barry M #29 and collection 2000 cream puff matte lipcream in angel delight 4.
simple to do, eyes wash over the lid with Br5 and then with the back line draw little c shapes facing random directions on your eyelid in random spots and every so often a little circle or a dot by the opening of a c shape then fill the hollow of the c shape with the bronxe coloured pencil.
For your lips, apply the lip cream and then dab your finger in Br5 and pat that over your lips evenly, then draw little c shapes and circles and c shapes with dots near the opening like on the eye in random spots on your lips and the fill the hollows of your c shapes with the bronze liner. To make it last for ages, apply some lipcote over the lips to seal the colour.
How easy was that!?
Rawr darlings
xxx

Sunday, 20 May 2012

You are GOLD always believe in your soooul... ahem.

Here we some guilded goodness coming at ya like slam!
I couldn't think what to do now I've finished my history blog, I am at an end of that... and the beginning of what? May have to go ask my facebook page what it thinks (www.facebook.com/sparklesplat) hmmm, I'm debating doing some random bits or doing another theme like disney princess or hogwarts... well... hmmm. Until then it'll have to be random bits. Like todays golden ray of sunshine on a bleak, grey english day.
Behold the almpst painful level of gold going on here, I am the gilded girl, King Midas poked me in the eyes, I had an unfortunate schmelting accident (if you know your Austin Powers, you should be giggling by now), and other gold bassed references... oh wait... 24k peepers :D I'm done now, comment if you have any more puns you want to share with me.
Moving on, and getting down to buisness, lets tell you what I used so you can recreate this look for yourselves:
Maybelline Great Lash blackest black mascara, Bourjois Volumizer mascara, Barry M Kohl Pencil #29 bronze, Collection 2000 Glam Crystals gel liner #3 funk, Bourjois Éclat Minéral pressed powder #02 vanillé, Collection 2000 sheer loose powder #2 translucent, Claires Accsseories body crayon in Gold from the dark set, Avon Arabian glow bronzing pearls, Urban Decay eyeshadow in Half Baked, from the 120 palette G1, G3, G4, G7, some 4mm size skin gems (can be already adhesive or you can use eyelash glue to stick them to the skin)
Now, this is how you make yourselves into golden gals, or guys:
Firstly, get G1 and with a soft brush wash the colour over your lids and up to your eyebrow. Then use the same brush and apply G4 to your lid, and again with the same brush apply G3 to the outer corner and crease of your eyelid, then use G7 under your lower lashline to about a third of the lashline and the upper lashline all of it. Then get your eyeliner and line the lower lashline where ever you haven't got your gold shadow. Then use the first mascara and apply a thin layer to your upper lashes and lower lashes, then use the Bourjois to coat your upper lashes (the reason we use 2 is I have found the first one preseperates the lashes, preventing clumping and adding even more volume and longer wear and Boyes is a good place to get these products for cheap). Now get the gems and stick them in the way I have done, one in the inner corner of your eye and 4 in a diamond on your outer corner. Now cover your now dry lashes in glitter and in the gap made by your gem, fill that with glitter and the inner corner, slick some glitter radiating from that gem. And now just to bronze that face a tad, use a big brush and apply some Bourjois face powder to your cheeks, chin and forehead, and do the same with the translucent powder. Now get an angled brush and lightly sweep some bronzer from your temples to the apple of your cheeks to add a golden glow :)
Now for your lips, use the bronze eyeliner pencil and shade in the center of your lips and smudge it outwards with your finger and then line your lips in the gold crayon and smudge that inwards to blend with the bronze. Sorted :D
Now go forth and glow my darlings!
xxx

Saturday, 19 May 2012

18th century girl

Righty then, here we go :)
this one is pretty simple, and I have a massive rant to get through so that happily co-incides.
RANT: OK, I am absolutely skint, I have no money, why? I owe my mum over £100 cause of paying for shit for uni like my accomdation booking fee and my crb check, and on top of that i have to buy my passport and that means I can't buy any new make-up, went into boyes today and they're stocking some decent stuff at the moment and even though it is cheap as chips I can't afford any of it, I need a new concealer, some more lipsticks and some better blusher but no, not even for just over £5 can I afford it. You know what world? Bite me.
Ok... Better
Here's the look:
sorry you're peering up my nose here but the light was so bad this is the only angle I didn't look shoddy in...:P
Anyway, anyone interested in history will know, georgian and victorian ladys liked to have a pale complexion, it gave the impression they lived pampered indoor lives and did not have to slog it out in the fields like the working women. Those who couldn't get that whiter than white look cheated (kinda like we do these days but in the opposite direction, we use bronzer to fake a tan, they use powders to fake the pale) they used various facepaints and powders that were lead based and VERY POISONOUS and shortened their already short life expectancies (what with multiple pregnancies and births, no penecilin, less than great hygiene and interesting medical practices and baaaad diets) ahem, history lesson over for now.
They liked the pale face, thick eyebrows, flushed lips and flushed cheeks cause it was beauty :) okay
Here's what I used:
Snazaroo white face paint (code 000), some blush from the nameless ruby and millie palette (just researched it, apparently it is a travel case set, still without a proper name, but google it, it's red patent/pu case), colours P9 and Br12 from the 120 palette, collection 2000 matte lip cream in cotton candy 1 and rimmel professional eyebrow pencil in 004 black brown (regardless of your colouring use a dark pencil cause they liked thick dark brows k?), collection 2000 translucent loose powder and bourgoise face powder in vannile.
How to:
Use your fingers and rub them in the white paint and gently rub some off onto your face, because we don't want to be ghostly like the Geisha, just damned pale. Do this all over your face, working in a light layer of white, then grab a big fat powder brush and rub it into the bourgoise powder and apply that all over the face, then do the same with the loose powder. Now get your blush and a large brush and get a little powder on the brush, apply all over the cheeks and build up the colour until you look flushed. Now get an eyeshadow brush and pick up some P9 and wash that over your eyelids up to the bone of your socket then under the lower lash line, use Br12 just on the outer corner. Now to do your brows, get the pencil and from the thickest part of your brow in a straight line draw in your eyebrow to meet the other side of your eyebrow, like you can see I've done on mine:
And colour the rest of your brow with the pencil. For your lips its simple, just fill them in with the lip cream and you're done :), now go get them gentlemen girls and marry into wealth or whatever xD
xxx

Friday, 18 May 2012

Geisha face a gogo

*sound of shamisen and japanese singing*
Hello darlinks :D didn't post yesterday I was busy doing college work (which I should be doing now but I cannot neglect you again)
So I'm still on the history band wagon at the moment, and I've brought for you today a Geisha (not a perfect one, I'm not practiced like the Geisha in Japan, especially Kyoto Geisha) and the tutorial uses suprisingly few products but I may end up having to recommend more to make your look more polishhed than mine.
Here we go :) I don't have the Japanese profile either, so alas it's never likely to look perfect :( and I got it in my hair x(
Here's what I used: Snazaroo face paint in white (code 000), Black liquid eyeliner (doesn't matter which but don't use an expensive one cause this will ruin it I used a anonymous free sample I've had for ages), eyeshadow colour R5 and rimmel lasting finish 1000 kisses lip liner in dynamite red #21, and a pinky blusher from a palette by ruby and millie that I do not know the name of :( sorry but and pinky blush will do.

Ok, I'm gonna suggest other products as I go along to improve the quality of your finish in comparison to mine which sucked cause I rushed a bit. Ok, to start with you're gonna want to prime your face, use a thick primer, something like a thick cream or stick concealer, to smooth the texture of your skin and to even your complexion out. And conceler will stand up better to the punishment of the water in the facepaint better. Coat you whole face in concealer!!!! And try to do it evenly, so use a sponge, my technique is like this, dap/stirpe/smear some concealer straight onto your face and smooth it around with the sponge, build layers until you are staisfied your face is even and smoooooth. Now to remove your eyebrows... yep, Geisha covered their natural eyebrows so don't worry this comes off with a good wash: First what you do is smooth your brows down with a brow brush until all your hairs are flat to your head. Then get some NON-TOXIC WASHABLE glue stick (prittstik is always good, I use that) and smear it on to flatten the heck outta your brows some more, and use a finger to smooth the brows down, now get a small spatular or I use the flat end of a cocktail stiring stick and mush some more glue onto your brows so they are sticky and flat as the proverbial pancake. Once that's done and you ar positive your brows are flat and going nowhere, grab some stick or cream concealer and apply that over your brows evenly, then dust over that with a brush and some transparent or slightly tinted powder, now repeat the concealer and powder bits until you have invisible brows. Now blend around that until it looks as though you naturally don't have eyebrows (you can see in the picture I didn't do this, I was pushed for time but it's worth it if you want the effect). OK, not your face should look odd because it is one solid colour. Wait for everything to feel dry and set this should take a few minutes so go on facebook, check email or do a puzzle.
When it's dry, get a cup of water and a foundation brush, dip the very tippy tip of the brush in the water and swirl the brush in the white paint until the consistency is like paste and starting from your nose radiating outwards paint your face white. Keep mixxing your paint up and dipping your brush in the water to keep your paint supply up remembering what the consistency should be like.
Let the first layer dry. Then, thickening the consistency of the paint a little, do another layer to even out the colour using a sponge, dabbing it on, then, clean your brush and dry it, or use a clean kabuki brush and buff the lines out of the make up using gentle circles. Make sure you cover your lips well and truely!
Now get a large powder brush and swirl it in your blush to get a light level of colour on it and sweep it up and down your cheek until you get a light bloom of colour. Now to your eyes, use an angled eyeliner brush and dust the red lightly around the outer corner and sweep it in to your inner corner on your upper lid and half way to your inner corner on the lower lid. The starting from the middle of your upper lash line, draw a thick straight line, don't follow the curve of your eye, just start from that point and draw outwards till just past the corner of your eyelid, then from half way into your lowerr lashline draw a think line up to meet that end and fill in the gap.
Now for your eyebrows, use a grey eyeshadow and another angled eyeliner brush to draw on a thin, medium dark grey brow on, make it thin and curved.
If I ever do this again, I'll make sure I have more time to make it good for you.
Goodbye friends.

Wednesday, 16 May 2012

Woadent you believe it?

Hahahaha I'm sorry I couldn't resist I love my puns :D
here's some woady goodness, inspired by the war paint on Kiera Knightly's arm band in the film Arthur (http://omnipotent-film-critic.com/img/arthur-9.jpg you'll see it here)
It's not neat but that's because the eyeshadow is not as highly pigmented as I had hoped it would be :(and running the eyeliner over the lines again and again would make my eye sore)
Anyway, I used Barry M's metallic blue liner in #6, but I wasn't impressed with the depth of colour or the easy with which it went on, it's not a good consistency to get the rich colour I wanted, so use another for this to make the colour pop.
Anyway...
The design is simple, a long line of medium thickness over the lash line, lines starting in either corner of your eyelid, meeting almost at the middle before they curve up into what should have been a spiral but as I said, the colour wasn't rich :(
Then where there is the gap where your lines have curled upwards, draw a large dot. Then It's done, if I ever revisit this, I'll probably use this liner again, but as a uide, then go over it in a navy blue liquid eyeliner...

You can see I'm not happy with it hahaha.
Here is some woady history:
Woad comes from... wait for it... A YELLOW FLOWER, it's cut into bits, rolled up and dried, then when that's done, it's broken up into water and allowed to ferment then dried again and processed in various ways to make dyes for the skin or for cloth... Tadaaaaa
(this website where I got some of the info from tells you more http://www.woad-inc.co.uk/history.html)
Have a happy end of the week :D

Tuesday, 15 May 2012

Monday, 14 May 2012

The mighty hunter

Hahaha dorky title I know, but that preconception some peoplehave that Africa is a land of Amazon like forests and full of lush tropical zones is... wrong. It's quite alot of desert, and plains and some foresty bit in the middle where Africa spans the equator. Anyway, that bit's nothing to do with what I post about which is make-up, so here we go, my African tribal themed historical post:
I took my inspiration from this website : http://wallinside.com/fotos/1314351988african%20jewellery%202.jpg the pattern on my eyes comes from one of the triangle things dangling from what may be her ear. The rest of it, colours and the other stuff on my face I made up for fun which you can do too if you want.
Alrighty, this is what we do: we use 3 types of snazaroo facepaint, black (code 111) green (code 444) and white (code 000), a small cup full of water and the flattened end of a wooden cuticle pusher.
How to do this:
First get the white out, dip your finger in the water and put A DROP of water on the paint, then use the flat end of the cuticle pusher to mix the paint to the consistency of sticky mud. Then gather that up on the flat part of the cuticle pusher and use a tooth pick or something (NOT A NEEDLE! That's the wrong kind of pointy) If you're creative, just chop the pointy end of the cuticle pusher off and use that. Dip the pointy end in and make dots in a triangle shape in the centre of your eyelid mine went:
.
..
...
....
.....


Then on your lower lash line, dab 4 equalish spaced dots of white paint on your lower lash line.
See? Do the same for both eyes, then wipe the excess paint off the cuticle pusher.
Now for black, like we did with the white put a drop of water using your fingers on to the paint and use the flat end of the pusher to mix the water and paint to a mud like consistency and then gather the mud like paint on to the flat part of the cuticle pusher. Then dip the pointy piece into the paint and dot around the edge of the tirangle like in the picture.
I think you have th jist now of how to make up the paint, now you just do the same for the green after you have thoroughly cleaned the black off the wooden cuticle pusher. Then on your lower lash line, on wither side of the white dots, put a black dot and then round your tear duct (the inner corner of your eye) put four dots curving upto your eyelid. For the green dot the outside of the triangle in any way you want, and then on your lower lash line, in between black dots put a green dot.
And the eyes are done.

Now for the extra bits, you'll likely have excess green paint on your cuticle pushers flat side, streak your cheeks with it from your eye diagonally. Mix some more black paint and flank the green with black lines that are angled away from the green stipe, then use the black to strip down your nose and with the black again make 3 stripes under your lower lips, make the middle line longer than the two either side of it.
Happy hunting babes :D


Sunday, 13 May 2012

It's all Greek to me.

I look slightly crazy in my ancient Greek get up :P
Hahaha well for anyone doing a Greek play wanting to recreate a Greek womans make up or if it is for a costume for whatever reason and you like getting your details right then here's a look for you.
They thought a pale face (because it meant you hadn't had to go outside and work and were therefore rich), red cheeks, red lips and dark eyelids and eyebrows were signs of beauty. You can bet they didn't look like the bronzed sirens of hollywood that grace our screens in films like Troy!
They used lead paint, red ocher and charcoal to get the looks they wanted.
Anyway, lead is toxic to us, red ocher and charcoal are old school so I used these instead:
Barry M kohl pencil in Black, Collection 2000 cream puff lip cream in Fairy Cake 3, eyeshadows from my palette in Bl1 and Bl4, Snazaroo face paint in white (code 000) and avon magix face perfector. For blush I used one from a Ruby and Millie palette, I don't know the name of the blush or the palette. But just use any reddy coloured blush or a red toned blush.
Firstly prime your face with the Avon primer, then with your hands, rub your fingers into the face paint, you should pick some up and just gently rub that on to your face. Don't use a brush and water, you'll rub off the primer and it will be way too white, this method means you get just the right amount of white on your face. Then sweep the lip cream on to your lips, just one coat will do. Then use your index finger to apply the shadow, use Bl4 all over your lids, and do just keep it on your lids, nothing fancy and don't get it all over, on such a pale face it will look like you've been punched! Then use Bl1 on the outter corner to darken the outter part slightly to make it stand out more. Then use your eyeliner pencil to shade in your eyebrows, because they didn't have the option of browns and blondes to thicken the eyebrows and the black look was considered more desirable, just shade in your brows natural shape not too heavily but don't be gentle either.
And there you go :) they had no mascara, no eyeliner, but they sure made it look good or crazy, depends on your outlook.
Next week, Tribal Africaaaaaaa :D

Saturday, 12 May 2012

Aztechnicolour

That title took far less time to think up than you'd like to think xD
Second day of history week and I'm giving to you some jazzy eyes of Aztec quality :)
I'm unfortunately a little disappointed in the way they have turned out, they're not as neat as I wanted them to be and I personally think I could do better, but that's irrelevant right now. I can always come back to these looks later and change them to make them better. Also, my actual eyeballs look less than attractive at the moment, my contacts dried them out and made them uncomfortable, I really shouldn't have done a look tonight but... I promised daily and daily you'll get!
This is basically done with a whole bunch of eyeliners, I used Avons super shock gel liner in blackberry, Barry M eyeliner in (I've given up with the numbers) Red, Black, Turquoise, Pink, Green and Blue. I also used a Claires Accersoires Body crayon in gold and Avon Precission Glimmer eyeliner in olive and sleek eyeliner in canary
Here's how,
The eye on the left is done by creating diagonal lines on your eyelind starting with a balck V shape in the middle of your eyelid and creating lines of colour on either side till your eyelid is filled and then filling in the middle of the V and adding a central V within that, feel free to use the colours in any order you wish.

The right eye is done by making a cross shape in the center of your eyelid and drawing two outlines in various colours around it and adding a dot in the middle of the cross, then draw two diagonal lines about the width of your pinkie finger nail from the cross and filling in the gaps with colour.

The tutorial is not a tricky one, but a steady hand helps to not make it look a mess like I did. Oh and sharpen your eyeliners for it, it helps :)
Anyway, have fun with your colours here, don't even have to use the colour I used, if you have any wacky colours then go crazy :D
I think neon would look especially good but I have no neon.
Next week it is Ancient Greece and I promise it will look better :)

Friday, 11 May 2012

Walk like an Egyptian

Wey oh wey oooh wey oooh (youtube "the bangles walk like an egyptian" and you'll get what I mean)

Hey hey, sorry, long time no post, had a melt down over my college work the other day and just managed to smack myself about enough to come to my senses again. Here I am with a new post and that good old fashioned stiff upper lip :) (kidding about the smacking myself haha, I had a cry and now I'm better)
I'm doing another themed week, this time it's historical looks which I have researched so I am going for accuracy and fantasticness ;D One or two or the historical periods have no clear indication the women wore make up, so I have decided either to imitate the mens war paint or take inspiration from their textiles or jewellery to do the look.
Today's theme if you haven't already guessed it (if you haven't shame on you) is Egypt, Ancient Egypt to be exact, which has always held a particular fascination for me, I used to want to be n Egyptologist for a living, now it's a hobby because... well, I'm just flaky when it comes to deciding what I want to be :D.
I looked at the bust of Neferatiti for some inspiration and from Elizabeth Taylors Cleopatra character (not historically acurate but beautiful none the less)... So... Here we go:

Egyptian make-up was highly stylised and ornamental and only the rich wore as much make up daily as they did for ceremonies because the pigments were expensive. Kohl was easily available and so was charcoal to blacken round the eyes to ward off the evil eye and bad spirits and bring blessings and bestow the sought after almond shaped eyes which were considered beautiful.
I've used a plain black kohl pencil, Barry M's #1, eyeshadows were Urban Decays homegrown, misdemeanor and from my lablled palette Gr10. I also used an eyebrow pencil, for this look though just use a black kohl because the Egyptians went for well defined eyebrows and often shaved their natural ones and drew replacement ones on, I couldn't be bothered to cover my eyebrow as I've not perfected that technique yet.
Here's how we do this:
Firstly cover your eyelid in Urban Decay Misdemeanor, then Homegrown over that and then tap on Gr10. After you've done your eyeshadow, line your eyes, upper and lower lashes with a medium thickness line making sure you go round the whole eye like you can see on my pictures, then carefully draw a line from the outer corner of your eye and thicken in slightly till it blends with the upper line in terms of their thickness like the above picture shows.


As you can see, my eyebrows are thick and defined, my eyeliner encirclees my eyes and the green eyeshadow does not poke past my eyelid so when I close my eyes, my lids become an oasis of green.
If you are lucky enough to be nice and tanned for whatever reason grab a light to medium bronzer and wash it over your cheek bones with a large brush to bring out your tan because the Egyptians lived in North Africa, they had good tanned skin :) Oh and by the way, I envy your tan ;D


Anyway goodbye girlies for tonight, tomorrow expect Aztec themed fun with a bit of a twist ;D *sundances into the sunset*

Monday, 7 May 2012

And now for something totally different...

Remember I spoke of a model much earlier in my blog? Well here is her first starring role here... welcome to the internet SHIVANI!

I think she looks ace :D she isn't used to wearing so much make up, she's quite the natural type only often wearing a light layer of foundation so I think she was shocked. Anyway, I didn't make her look too over done really, I only put some primer, foundation and blusher on, some shadow on her eyes and some mascara. So here's what I used, this is a good look for those who don't want to wear obvious make up, or if it's a first date or special occasion and you just want to look natural but still be wearing make up :) >>>
The equipment: Avon magix primer, foundation (whichever you prefer, matching it to your skin tone, I tend to like the creme or liquid types they're nice to use with a brush), accessorise blusher in shade 3, collection 2000 pressed powder, urban decay eyeshadow in half baked and any mascara of your choice, I use bourjois volumiser mascara (the one with the 2 stage brush)


Hokey kokey, here we go this is how we do this:
Firstly prime all over your face with the Avon magix primer, make sure it's all even and goes upto your hair line and just under your jaw I used a sponge which is preferable it makes it easier and keeps your hands clean. Then do the same with the foundation, use a brush and apply the foundation, starting from your nose and working outwards, go over your eyes. If you have asian skin, you may find you suffer with darker circles under your eyes, take extra care with them, and after applying the foundation with a brush, just get a little on your fingers and dab it on over the draker areas. Then with a big powder brush dust all over your face and eyes with the powder, then grab an angled blusher brush grin big, flashing your teeth and from the part of your cheek that juts out most under your eyes sweep blusher backwards towards your ear following the way your cheeks jut outwards when you smile. That's the face, then to your eyes, with a soft eyeshadow brush wash over your lids with the gold eyeshadow until its nice a glowing, then coat your lashes in mascara.

Tada, glow forth and be happy :D

Saturday, 5 May 2012

It's revamp saturday!

So I have updated the blogs look as I may decide to do on a monthly/ bimonthly basis... And to celebrate this switcharoo, I have the delight of posting you you all a trans-gender post today, my good ol' buddy Carrick sat for me a few weeks ago for some make-ups. Here are the results...
See... pretty as a purple picture :D
I do need stronger blush though, because you cannot see it on the pictures... hmmm. Anyway, if you are gonna wear make up boys, make sure you have shaved as close as you can so you are super smooth :) It helps immensly with the application of all the coverage you shall need to create a nice, even and attractive amount of coverage without looking like you have trowelled it on! :D I'm also experimenting with covering eyebrows currently for some seriously out landish looks with crazy eyebrows for those who have a "YEAH!? BRING IT" attitude and want wacky brows without shaving your natural ones off :)
Anyway here's how we do this....
You're gonna need a translucent face powder, I used a collection 2000 sheer loose powder #2 translucent. I also used benefit some kinda gorgeous foundation in "lite" but you use which ever foundation you like but make sure it is the same colour or a shade lighter than your natural skin tone. Also in the mix I threw in some Bourjois Éclat Minéral radience powder in my colour which is vanillé but again, use whichever colour is the closest match to your skin. The list just gets bigger, and this is just the face so far! I've not even come to the eyes... I also used Avons magix face perfector and Avon face pearls for blush, which I evidently need to revise hahaha and buy some more pigmented blush. OK, this is how I covered his face to make him look flawless ;)
Firstly use Avons magix face perfector with your fingers or a sponge applicator and cover your WHOLE face in it. that includes going over your eyelids and upto your hairline. Then, take up your foundation and with the same applicator or a foundation brush (BUT NEVER YOUR FINGERS OR HAND!) do the same cover your whole face until you are happy with the blend out of colour, make sure there is no fondation line on your jaw and blend the make up into your hair line and down past your jaw line so it looks invisible like you're wearing nothing at all :D. Then use the Bourjois powder and over your nose and forehead and across your cheeks blend it in to add some matte colour over your make up with the powder pad inside, then use a big brush such as a kabuki brush or large powder brush and dust your whole face with the powder to set your colour and give a matte glow to your face. NOW TO THE BLUSH MOBILE! Use an angled blusher brush or a medium sized powder brush and grin big and where your cheeks poke out the most is where you apply your blush, you start closest to your nose and work backwards to your eyes over and over layering the colour up until you are happy with your colour, I used 3 washes of blush on Carrick. And that is his basic face done...


Tada a bonny wee lad if I ever saw one.
Now for his eyes >>>>
I used my big palette of colours from light in the box, colours V3 and Pu9 and Avon super shock eyeliner in blackberry.
This bit is relatively easy (except on my model who has flickery eyelids and wouldn't sit still!). Anyway, we used V3 on all of the eyelid to make it an even wash of purple, then into the crease and the outer corner I blended Pu9. Then I used the purple eyeliner and just lined above the upper lash line with a semi-thick line and coated his eyelashes in mascara :)
See :) Very fluttery.
Anyway that's all for this one folks :D

Friday, 4 May 2012

Eye of the Tiger :D

RAAAWR :D
OK... I am sorry for not posting I really am but I've been pretty hectic. College is coming to an end, I am up to my eyeballs in work, I am trying to get as much time with my boyfriend as possible before he goes back to uni and various other stuff's going on too. I am sooooreeeeee :(
Anyway, I have a cool animal print one for you today hence the cheesy blog title :D
Got me grrrr on and gave y'all some tigery goodness. Hobbs would approve I think.

I used suprisingly few products to get this look :) so good for someone with a small set of the basics (that in my world means a whole palette like mine of colours, mascara and black liquid eyeliner... please tell me if it's not the case :P).


Anyway, this look... it needs some of this: Black liquid eyeliner, colours W1, O2 and O4 of the rainbow palette, Barry M eyeliner in #24 and optionally gold glittery eyeliner.
And now lets get down to it, this is how we do it:
Firstly, in the inner corner, use the white eyeshadow and layer it up so it is really opaque on your eyelid, usually white eyeshadows go on more translucent so make sure it's nice and strong on your eye and blend it outwards slightly towards the outer corner of your eye, then, using O2, tap a line where the white is blending into the rest of the lid and blend into the white. Then use O4 from the outer corner of the eye inwards, blending into the other colours. This is where we get upto making the lines, so if you are uncertain of doing them free hand straight away, grab a black kohl liner (just your average black pencil liner) and lightly draw some guides of slightly wiggly thin lines streaking up and down your eyelid, draw some mid way between the top and bottom of your eyelid too and don't let the lines span the length of your eyelid if you can help it. When you are happy with the rough draft go over the lines in black liquid liner (unless you have already used that instead of making guide lines, well done :P). That will cue the upper eye done, to add definition and to make it pop a bit more, use the orange pencil liner to lightly line under the lashes of your lower lid and then coat your lashes up in some mascara to make your eyes go RAWR!
Oki doki? If you want to, use gold glitter liner to coat over your lashes, gives it a bit extra something, a little more dimension to the look.


You don't even have to worry if a line or two gets a tad smudgy, have you ever seen a tiger with totally immaculate stripes after all?
Anyway my lovelies, happy prowling ;)